This is a fun and easy project that can add alot to a plain old wood frame. They also look super cute on a shelf or in your kiddos room. I made this one to send to C for Valentines Day! It turned out super cute!!
{Mod Podge Frame}
Item's Needed:
1-wood frame (Micheals for $1)
Paint
Mod podge
paint brush
1 piece of coordinating scrapbook paper
2- 8-10in. piece of coordinating ribbon
1 large button that matches
1- 4x6 picture
Razor (not pictured)
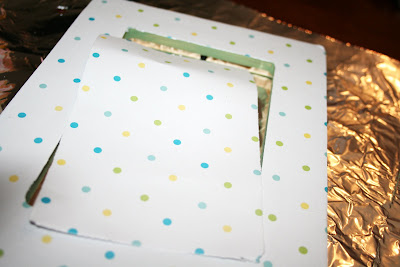
 Step 1: Trace your frame on your scrapbook paper and cut it out with scissors
 Step 2: Paint the back and sides of your wooden frame with coordinating paint.
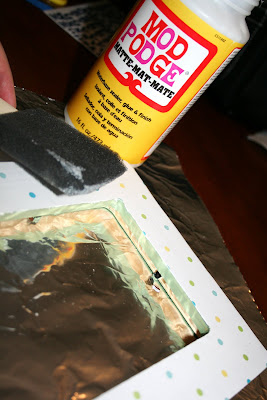
 Step 3: After your paint drys....Mod podge your paper to the frame like so:
 Step 4: Using a Razor blade or really sharp knife....go along the inside of the
frame and cut it out.
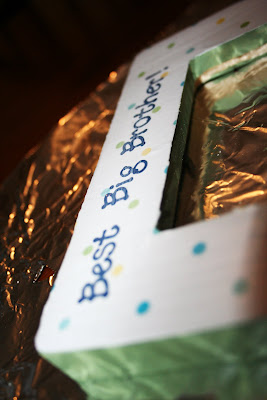
 Step 5: Then Mod Podge over the top and edges
 Step 6: Add your Lettering if you would like...these were stickers I stuck on...then did
 Step 5: Then Mod Podge over the top and edges
 Step 6: Add your Lettering if you would like...these were stickers I stuck on...then did
just a small coat of Mod podge over top of them.
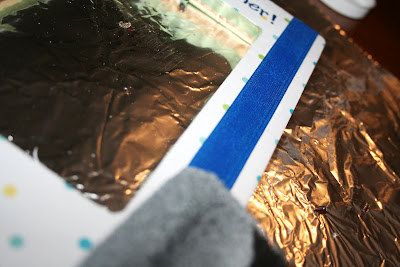
 Step 7: Mod podge on your ribbon (mod podge under not on top)
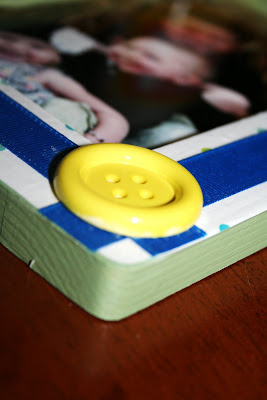
 Step 8: Hot glue your button on the corner of the frame
 Step 9: Add your picture in after everything has dried really well...and stand it up!!
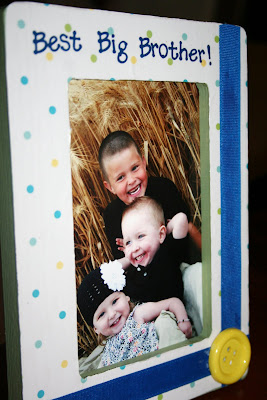 Super cute
 Step 7: Mod podge on your ribbon (mod podge under not on top)
 Step 8: Hot glue your button on the corner of the frame
 Step 9: Add your picture in after everything has dried really well...and stand it up!!
 Super cute
 {mod podge frame}


PERFECT!! I'm making a Michaels trip today :) :)
ReplyDeleteHave fun Jamie :) They are super easy and you can do whatever kind you want!! Send me some pics and I will do you for a Follower Friday! :)
ReplyDeleteman that's cute...Love everything!
ReplyDeleteVery Cute!
ReplyDelete