Friday, January 29, 2010

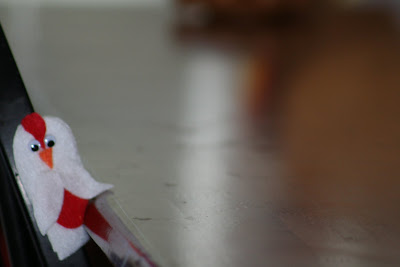
Guess What....

COMMENTS NOW CLOSED!!! STAY TUNED...WINNER TO BE ANNOUNCED TOMORROW MORNING!!!! :)
THIS IS.....


The person to guess what this is...You don't have to get it right on but somewhat close WINS!!!!


Here are the Rules:


1. Be a Follower...If you aren't over on the right side there is a


follower button you can click on to become a follower.


2. Try to guess what the pic is and what I made for this next giveaway.


3. HAVE FUN!!!!


I will post the winner to this GIVEAWAY on Monday morning. Comments will be closed as of Sunday night at 10p.m.


HAVE FUN!!


Here's a CLUE: "Manipulated upon prompt..."


**If nobody guesses it by Monday...we will start round 2 with a different picture and another clue**

Wednesday, January 27, 2010

valentine colors..

Here is a fun and easy idea to use for your kiddos or for a preschool craft or for just a fun craft for Valentines Day!! I used it with my kiddos for preschool and they all loved it and wanted to do it again and again!!

{valentine colors}
Items Needed:
Color crayons
Glue
Conversation Hearts
Paper with drawn hearts on it
Step 1: Have your kiddos or whoever is doing the craft color the hearts...I labeled mine with the different colors of the hearts I had. Then they colored it that way.
Step 2: When they finish coloring...count out the hearts for them to divide up according to color.

Step 3: Take your glue and get ready to glue the hearts on! I actually put the glue dots on there for them..(they are 2 and 3 year olds!) :)
Step 4: Have them use there ohhhh so cute chubby little fingers to push them on!!

Step 5: Let them dry really well and then hang them on the fridge or the wall as Valentine Decor!! My son still loves his!! HE is sooo PROUD!! :)

{valentine colors}
*To draw the Heart picture I used a heart cookie cutter and then did random designs around the edges of each one...then I scanned it and ran copies!!!*

Monday, January 25, 2010

blocks of love...

I {love} Valentines Day!! I {love} the pinks and reds and the decorating!!! Here is another cute and simple Valentines Day craft!! Have fun! :0)
{blocks of love}
Items Needed:
2- 2x4x4 blocks
2-2x4x6 blocks
Paint
Paint brush
Sand paper or Block
Vinyl/ Rub-on lettering
Embellishments
Distressing Ink AKA Stamp pad & Napkin :)
Step 1: Paint a few good coats of paint on your 4 blocks. I used Barn Red for all 4 of them! You could also paint them different colors...the choice is yours!! :)

Step 2: After your blocks have dried really well. Take your sanding block or paper and sand the corners and edges to give them the "weathered" look! You could also distress the corners with ink at this point if you would like!
Step 3: Rub-On or Transfer your letters L, a heart for the 0, V and E to your blocks. The L and the V go on the bigger blocks and the heart and E go on the smaller ones!
Step 4: Embellish with ribbon and buttons if you so choose!! I {love} buttons and ribbon!!!!

Step 5: Set them on top of a shelf...or counter or wherever you would like!! Step back and admire the cuteness!!!!


{blocks of Love}

Saturday, January 23, 2010

{stuffed with luv}

So I had extra felt from another project I was working on and this craft popped into my head...so I made them last night and I think they turned out pretty cute. Nothin hard super simple and cute!!!

{stuffed with luv}

Items Needed:

2- pieces of felt (pink & red)
1- pkg. of white embroidery floss
Rice
Ribbon and Buttons

Step 1: Fold your felt in 1/2 and cut a heart out of it. Then open your felt back up and cut around the heart you just cut to get 2 hearts that are the same size!!
All the hearts...different sizes!
Step 2: Take each set of your hearts and sew around the edges with your emboridery floss....be sure to keep it nice and tight so the rice doesn't fall out!
Before doing the edges you can do an "XO" or "LOVE" or whatever you would like on one
side of the heart and then sew it up. I do different size stiches to give it "Spunk" :)

Step 3: Leave a small opening to be able to pour rice into it...I packed them semi tight so they had shape!

Step 4: Sew the hole you left open shut and be sure to knot it at the end!
Step 5: (Optional) Embellish your hearts. You can tie ribbon around it or sew buttons on or just leave them how they are!!! :)
After they are all done...
Set them on a shelf and admire!! So cute and so...
{stuffed with luv}

Wednesday, January 20, 2010

Valentines Day Wreath!

Love is definently in the air in our home and I love Valentine's day...especially for the Conversation hearts!! Love them!! Here is another cute and easy project to hang in your door or where you please for Valentine's Day!!! Enjoy :)

{Valentine Day Wreath}

Items Needed:
1- Grapevine wreath (go to the DI...you can usually find one and you can
take it apart and you can reuse it!!)
A small piece of wood or old sign (My sign came with the wreath the back side
says "Merry Christmas ;0)
Paint
Paint Brushes
Stamps/ Foam Stamps/ or Vinyl
Wire
Ribbon 1- thicker, 2-3 smaller Valentine-ish Ribbon

Step 1: Take your wreath....If you got it from DI or from a second hand store...be sure to take everything off of it and have a clean plain grapevine wreath.
Step 2: Start wrapping your ribbon around the wreath..... until you have met back up with where you started. You can wrap it as close as you want or as far apart as you want. Just make sure that it is wrapped tightly so it will stay! :)
Step 3: Hot glue your ends to the wreath. I glued the first one down really well and then glued the other end to the first one... so it all matches up all pretty like!! :)
Step 4: Take your sign..or piece of wood and sand it down and paint it creme. Mine was already creme from the wreath I bought and it already had the small holes drilled into it for the wire!! This is the for sure way to go!! But if not..paint it creme and then drill 2 small holes one on each end for the wire to secure it to the wreath!
Step 5: I don't have a picture for this! Sorry :( But wire your sign to the wreath....it is fairly easy to do. I also hot glued the sign as well to secure it really well!!
Step 6: Take your paint for the letters...I have foam letter stamps I used...you can paint it on yourself freehand...use vinyl..whatever you would like!!
Stamp/Rub-On or Paint {Valentines Day} or whichever quote you chose to your sign.
Step 7: Take your smaller Valentine-ish Ribbons...I used 3 different ones. Take and cut 3 small pieces of each kind to tie on different spots on the wreath.
Tie them on!!
Step 8: Hang it up to dry...or leaving it sitting on the table whichever you prefer!
After it has dried...Hang it on your friend door for everyone to see!! Lovin it!!! :)
Tuesday, January 19, 2010

Giveaway WINNER!!

Ok...so I went to this website....http://www.random.org/ and put in my numbers 1-5 and it generated a.........
WAIT FOR IT....
WAIT FOR IT.....
The NUMBER 5!!!
JODI is the Winner!!!
I will send you your new Valentine bows ASAP!!! Keep your eyes out because I have a few more Ideas for Giveaways...I'm feeling the Giving spirit here lately ;) Thanks to all my faithful readers and those who comment...I will keep them coming. I have lots of cute Valentine projects in the works!!! Thanks again!! YOU are ALL GREAT!!!

Monday, January 18, 2010

Valentine GiveAWAY!!

{UPDATE}: Just a few more hours and I will pick a winner!!! Comment before it's to late!! :)


I'm feeling the {Valentine} spirit this week and wanted to do a cute giveaway for my ohh so faithful readers!! So here is your chance to win these {BEAUTIES}:

So here are the RULES!! You have to:
1. Leave a Comment on this Post.
2. Be a Follower on this Blog. If you aren't already..look to the right side and you can click on "sign in" or "Become a follower" something to that affect!
3. Tell me your favorite thing about this blog, or ideas of something
you might like to see on this blog!!!

This all has to be posted by 6 o'clock tomorrow night and I will pick a random winner!!! Have fun!!!! Thanks to all of those who follow and comment..your the BEST! :)


Just a Reminder of How cute they are and How cute they are on your Little One!!

Hugs & Kisses!

Valentine's Day is right around the corner and I thought I better throw together some fun easy and cute projects. Here is one that I did with a good friend of mine and we loved how it turned out!

{Hugs & Kisses}

Item's Needed:
2- 2x4x6
2x4x4
Red Paint
Pink Paint
Paint Brushes
Rub-On or Vinyl Letters (Hugs & Kisses , Lips and Heart)
Sanding Block or Sand Paper
Embellishments

Step 1: Paint all 4 of your blocks with a few good coats. I did the 2 bigger ones pink and the 2 smaller ones red but you can do the opposite! Whichever you like :)Step 2: After your blocks have thoroughly dried...You can sand them down to give them the weathered look! You all know how much I love this!!! :)
Step 3: Apply your Rub-on or Vinyl lettering to each of the blocks. Hugs & Kisses goes on the 2 biggest and the "&" goes on one of the small ones...while the other one has lips or heart or something valentine-ish!
Step 4: Embellish! My FAVORITE part!! Use valentine ribbon pink red and white buttons and go to town!

Step 5: Step back and admire your absolutely adorable Valentine Decor...
Then place it on your shelf or wherever for others to see!!
Love it!! =)

Saturday, January 16, 2010

{ "I SPY" Jars}

I found a couple of different ways to make these "I Spy" jars. I have seen them done in old water bottles, baby food jars, peanut butter jars, & with material and vinyl. They are super easy to make and lots of fun. My kiddos LOVE them!! Here is a tutorial for How I made them and what I put in them!!

{"I SPY" Jars}

Items Needed:
1- Jar or however you are going to make ( I had 3 extra Mason Jars)
Rice
Food Coloring
Little Gadgets or Small things (Odd's & Ends)
Hot Glue
List of Items
Tape
Ziploc Bags

Step 1: Take and Pour your rice into your jars, so you have the right amount of rice
measured out.
Step 2: Pour the rice into 3 seperate bags or just 1 however your making..
Put in roughly 5-6 drops of food coloring and zip it shut.
Step 3: Shake and move the rice around in the bag until the color is distributed evenly on the rice.
Step 4: Pour the rice out onto individual paper towels to dry.
Step 5: While your rice is drying. Find odd's and ends items to put into the jars. Ex. Buttons, jelly beans, screw, paper clip, piece of a straw, beads, penny.
Step 6: Type out or write out the list of what is inside each jar. (My kiddos are all about the same). Cut them to fit on top of the jar lid.
{I Spy List:}
A piece of Blue Ribbon, A purple circle, white thumbtack, Blue Jelly bean,
A paper Clip, A brown bead, A pink button, A penny, a piece of a straw, and a screw.
Step 7: Take tape of any kind and tape the lists to the lids of the jars.
Step 8: Your rice should be dry by now and you can put it along with the items inside the jar.
Like this :)
Step 9: Hot Glue the inside lid to the lid the screws on (Sorry no technical terms here :) ). Then screw it on quickly to the jar and make sure that it is very secure and can't be taken off!!
Step 10: (Optional) Embellish (My favorite thing to do!!) your jar with ribbon or buttons or
whatever you feel like! I hot glued the ribbon all the way around the edges!
Then tied a knot!
I continued the process with all 3 and they are set in the bag and ready to take to church.
They aren't to noisy....they can be when shaken really hard but to be turned over and around they are perfect!!!
* * The rice may stick a little after it has sat and all settled together....DON'T freak out like I did and think the whole project was ruined!! :) Just shake them up a bit and your back to normal!!! **
Hope you enjoy!! Keep your eyes open for a giveaway this week!!! Hope it's a good one for all of you! :)