Sunday, August 1, 2010

Twine & Bean Styrofoam Balls...

I have seen many tutorials and lots of different ways to do these decor balls. My bathroom is in Brown/Blue so I decided to do more brown's in there. So here is what I came up with!!
{Twine & Bean Styrofoam Balls}
Item's Needed:
Styrofoam Balls
Twine
Pinto Beans
Scissors
Hot Glue gun
Glue sticks
Step 1: Take one of your styrofoam balls and unravel a bunch of twine...start by a small "U" shape and then go in circle's round and round...it takes some patience and LOTS of glue!! :) Keep winding...Keep Glueing
And your finished!!!
Step 2: Take another styrofoam ball and start by glueing one bean on and do the same thing as the twine...just go around and around..
Keep going...
Then you have your finished decor balls...put them in a super cute vase...Found at TJ Maxx for 3.00!! So Super cute!!! :)

To come soon...More bathroom decor for my bathroom!!

{Twine & Bean Styrofoam Balls}

Sunday, July 11, 2010

Laundry...

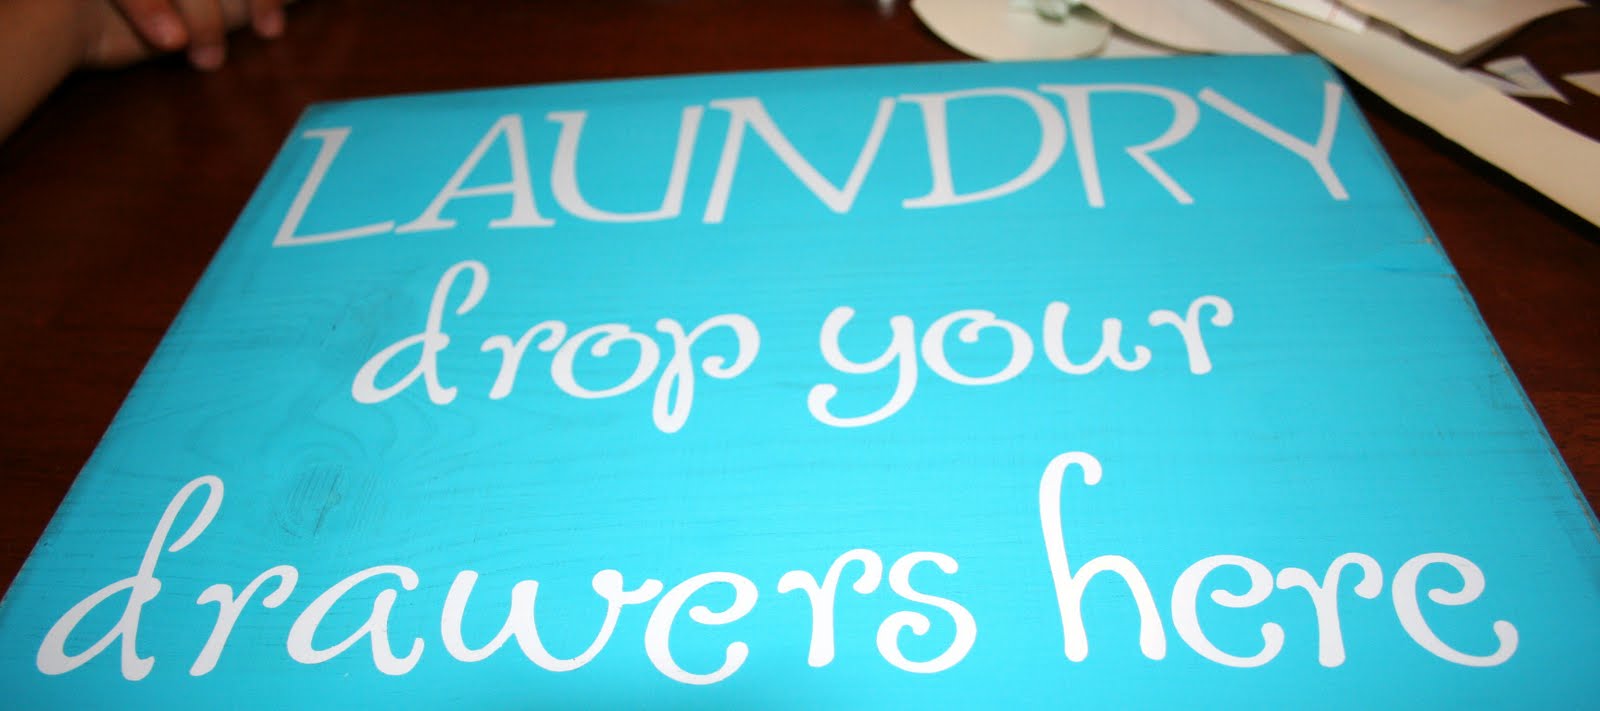
This is a simple and fun decoration for your laundry room/area!! It's very easy to make and turned out super cute!! :) Here's how I did it:

{Laundry}
Item's Needed:
1- board...any size you want
Paint
Paint Brush
Vinyl Wording or Stencil
Twine
1- med. clothespin
Ink
Sanding Block
Step 1: Take your board and paint it...mine is a bright Turquoise!!

Step 2: After it has dried really well take your sanding block and sand your edges down to give it
the weathered look.
Step 3: After sanding take your stamp pad (if your cheap like me :) ) or your distressing ink and ink the sides of the board a bit!
Step 4: Next take your lettering or stencils and place them all on the board. The saying for this board is "Laundry, Drop your Drawers here!"
All put on!
Step 5: Take your twine and clothespin and tie it around the bottom/side/or top of the board whatever you choose! (I didn't leave the arrow on the board...I decided I didn't like it!!)
Last hang it up and stand back and Enjoy!! :)
{laundry}

Monday, July 5, 2010

Boredom Buster Jar...

I realize that we are already 1 month into summer but this is a super fun idea that my kiddos love!! Alot of times during the summer you get the "Im Bored" "I don't have anything to do"...so I came up with about 75 fun things/simple things that kiddos can do. Here is how I did it:

{Boredom Buster Jar}
Item's Needed:
1 med/lg. plastic rubbermaid container or bowl
75-100: Summer Activities or "things to do"
Scissors
"Boredom Buster" in Vinyl or you can write it on
Cute Scraps of paper
Ribbon
(Not Pic.) Pinto Beans
Step 1: Take your Container/bowl and cover it with your cute scraps of paper
Step 2: Apply your "Boredom Buster" lettering to the front of the jar
Step 3: Take your "activities" and cut them into strips. (I used Microsoft to type them in and then just printed them out)
Some ex:
"Go to the Library"
"Make a Lemonade stand"
"Make a picture out of rice/beans/ lentils"
"Write a story"
"Go to get ice cream"
Step 4: Fold all your strips and throw them into the container
with the pinto beans ( I alternated Beans/some strips/beans...etc.)
Step 5: Add your ribbon to the bottom of the jar/container and store it on a shelf or on top of your refrigerator!!
HAVE FUN!! :)


{Boredom Busters}

Thursday, June 17, 2010

Dad's Day...

Father's Day is right around the corner and what better way to celebrate it then with a little homemade gift or two! This was made for my oldest's "other dad"(stepdad) :) I thought it was easy and lots of fun to give to the dad or dad's in our life!! Here is how I did it! :)
6 Bottles:
Item's Needed:
1- 6pkg of IBC cream soda, or Orange Cream Henry Weinharts
3-4- sheets of scrapbooking paper that coordinate
Glue
Scissors
6- printed off smiley faces/6 little says ex. "I love you" "your the best" 1- Happy Father's
Day! (All done on Microsoft and printed on cardstock)
6- different kinds of candy or snacks (preferrably small to fit in and out of the bottle)
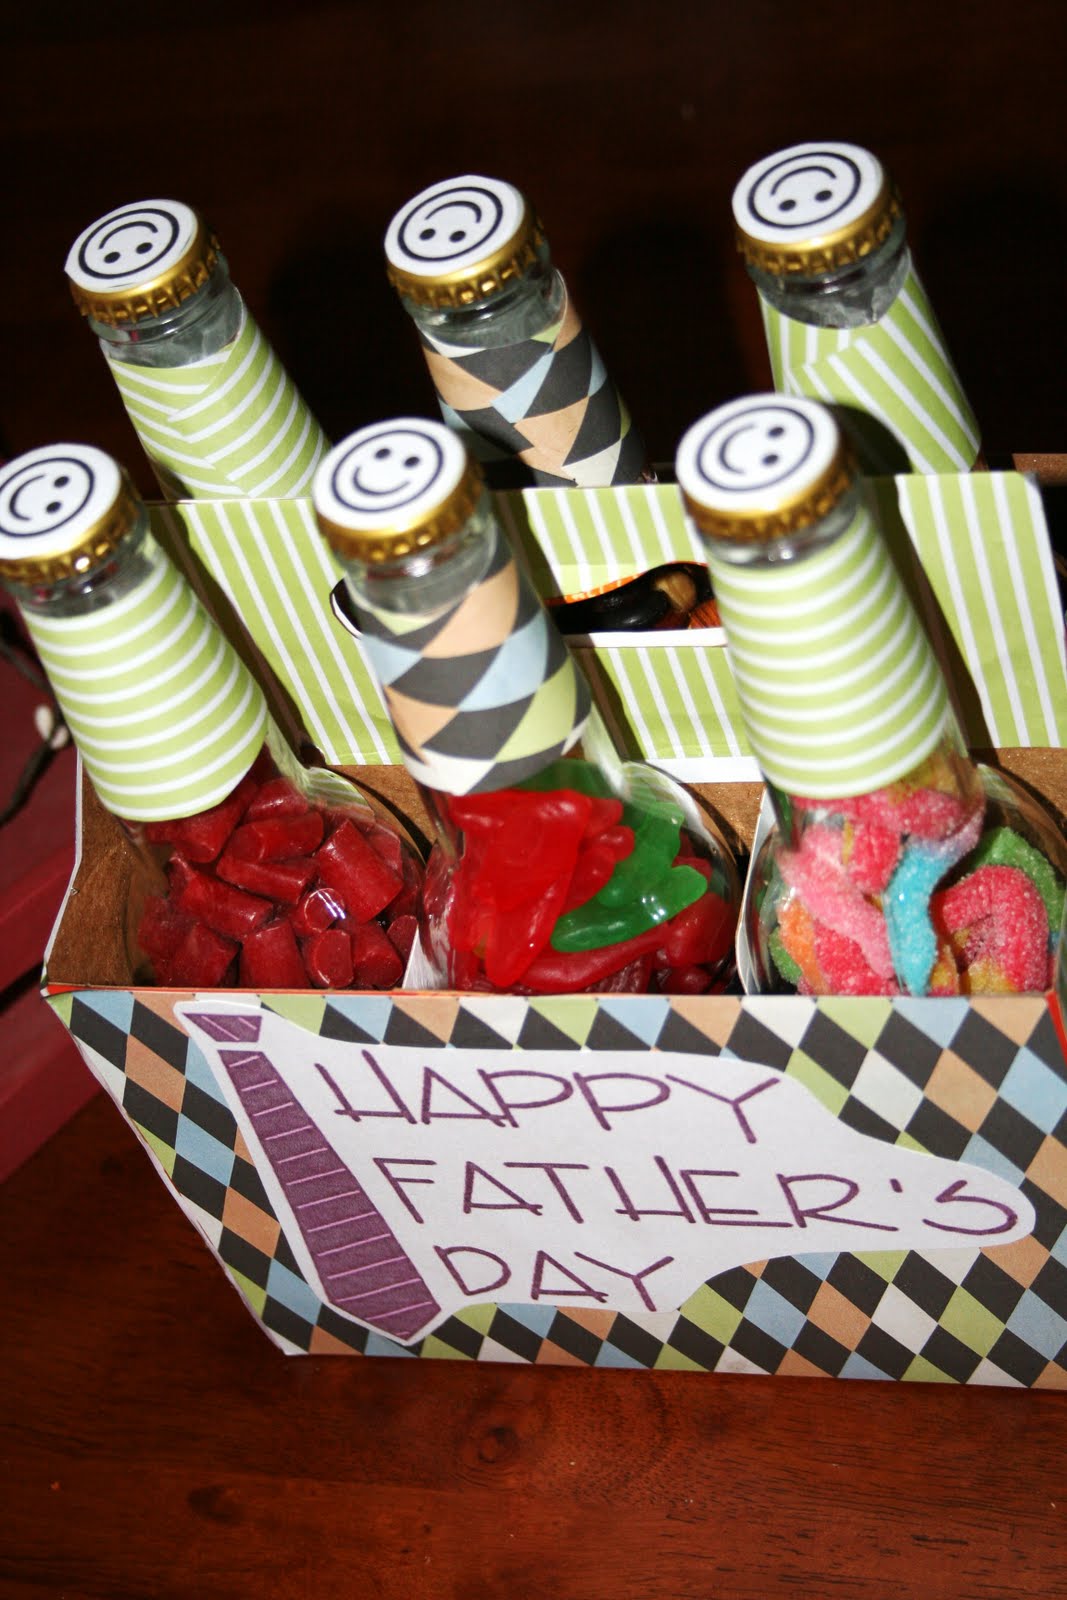
*I used Cherry Nibs, Trail mix, Sour patch kids, Gummy worms, Boston Baked Beans, & Swedish Fish
Step 1: Drink the soda out of the bottles I recruited my hubby to do this for me!! :) Or you can pour them out whatever you chose to do!! Then wash out all 6 really well, peel off the stickers and make sure they dry completely!
Step 2: Take your 3 coordinating scrapbook papers...and also your scissors
Step 3: Cover all 6 bottles around the middle where the wrapper originally was
Cover the box also...
and the tops of the bottles like so!!
Step 4: Fill all 6 bottles with a different candy or snack
Step 5: make sure it all fits well into your box! :)
Step 7: Take your 6 printed sayings and glue them on to the scrapbook paper in the middle of the bottle.
Step 8: Also glue on the "Happy Father's Day!" & the 6 smiley faces like so:


Step 9: Make a little card to go with it and there you have it!! :)


Another Quick Father's Day Idea:
COUPONS FOR DADDY!
Items Needed:
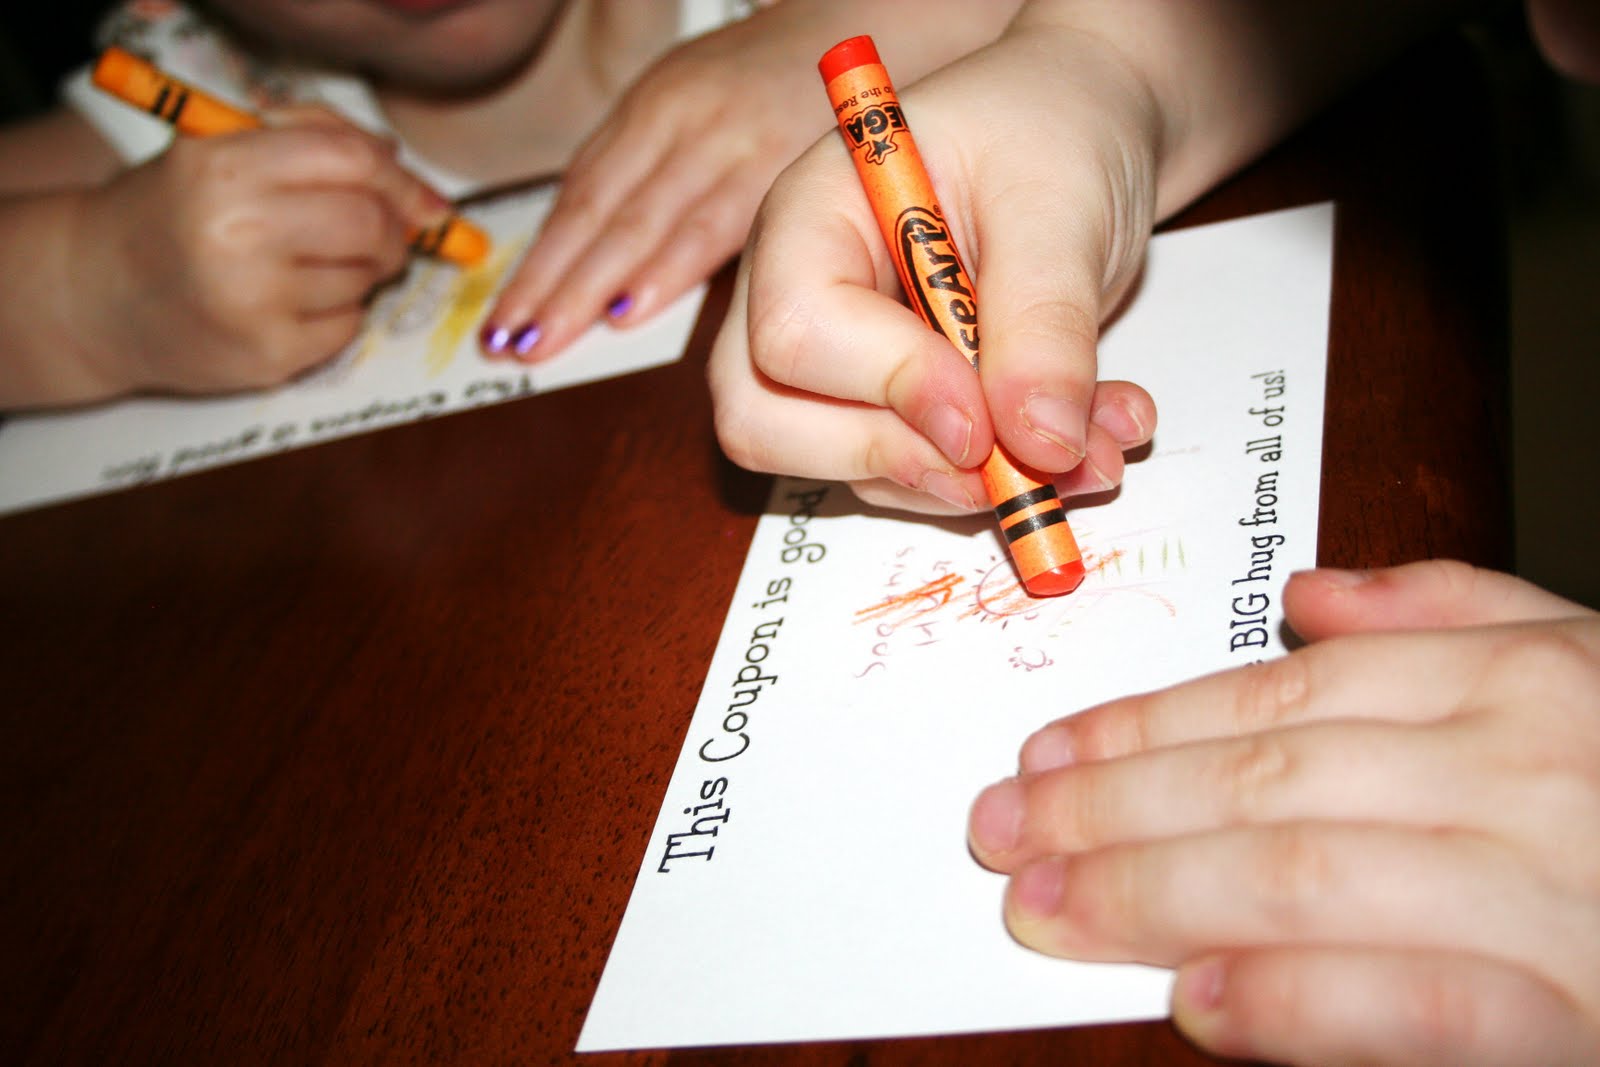
Assortment of made up coupons (I made all of them on Microsoft)
ex. Help mow the lawn, dishes, wash the car...
Hole Punch
Scissors
Coloring Crayons
Your kiddos
1- ring to connect them all
Step 1: Start by cutting out all of the coupons making them all about the same size

Step 2: Have your kiddos color the pictures on them!!
Step 3: Punch holes in the top left corner of the coupon
Step 4: Connect them with the ring.
Your all done!! Super cute! :)
{daddy's day}

Tuesday, June 15, 2010

Flower Bow...

These are my favorite bows out of any of the kinds of bows I have made...they are easy and soo cute and you can combine so many different ribbons!! Here is how you do it!

Item's Needed:
For this bow:
4 different colors or patterened ribbon
1- large button
Hot glue gun
Scissors
Step 1: Take your ribbons...Cut the one you want on the bottom longest, then get a little shorter until you get to the fourth one. You will need 3 of the two longest, then 2 of the 3rd shortest and 1 of the shortest if that makes sense!!! :) Pictured below:
Step 2: Take one of the pieces of the longest ribbon. Fold in one end to the middle and glue, do the same with the other end. It will look like this:
Step 3: Do that to all 3 pieces and then glue them together like so:
Step 4: Take your next layer of ribbons (3 of them) and glue them the same way.
Step 5: Glue them together like so:
Step 6: Glue your layers together
Step 7: Do the same with your third layer (2 pieces)(black in this photo) and then make a figure eight with the top piece and glue all the layers together.
Step 8: Glue a large button that matches to the top. I made a set! Also glue an alligator clip to the back of your cute bow and ENJOY!!:)
Step 9: Get busy cutting ribbon and make a bunch! Here is what I did in one sitting! They are so fun :) One piece of advice that helped me to get down faster was to cut all the ribbon first and then sit and glue them!! :)
{Flower Bow}

Monday, June 7, 2010

Framed Flower...

Hey all! Whew...it has been a busy and ongoing month! But I am back and I have alot of ideas up my sleeve that I am ready to get out there and to share!! Here is a cute/simple framed flower that I did for my lil ones room that is all pink and black! It turned out super cute!! Here's how you do it:
{Framed Flower}
1- black frame (4x6) 3 dollars at walmart
1 piece of scrapbook paper approx. 4x6 in size
1- flower (gerbera daisy) pink of course :)
Glue gun
Scissors
Buttons
Step 1: Take your frame and your piece of scrapbooking paper and put the paper infront of the glass like so: Step 2: Next take your flower off the stem and so it is in layers...Using your glue gun take each layer and glue in to the paper...then glue the center on.
Step 3: Take your buttons and glue them on the frame
Step 4: Stand it up and enjoy! Super cute for your lil ones room! :)
{Framed Flower}

Friday, May 7, 2010

Picture this...

Whew!! I am back! Sorry I have been gone for so long. I took a much needed break from my "blogs"!! But I am back and just in time to share a quick easy mothers day gift idea! :)

IF YOU ARE ONE OF MY "MOM'S" OR A GRANDMA TO MY KIDDOS DONT GO DOWN ANY FURTHER OR IT WILL RUIN YOUR MOTHER'S DAY GIFT!!! :)
{Picture This}
Item's Needed:
1- large black frame with a matte for an 8x10
2- sheets of coordinating scrapbooking paper
1- colleague of words/names that define your mom (I did mine
on just a word program and turned them different ways and printed it on cardstock)
Mod Podge
Paint brush
Coordinating Ribbon
Step 1: Take your frame and take the matte out of it.
Step 2: Take your scrapbooking paper tear and cut pieces that cover the matte, mod podge them on like so (below) I didn't mod podge over the top at all they stuck on just fine:
Step 3: After it is all dry and good put the matte and your cardstock colleague back in (I had to tape the cardstock to the back of the matte to get them to stay in straight! :)

Step 4: Take your ribbon and wrap it twice around the frame and tie it in a bow to the left or right of the colleague.
ENJOY :)
Carter and his mom gave me this for Mother's Day this year and I had to share!! Super cute and easy idea. I am a {lover} of Dove chocolates and so they did the container with the words "I Dove You" on it. They did a super cute card and Carter explained that he "doved" me and that he and his mom appreciated all I do. Super nice!!! I love it!! :)
{Picture this}