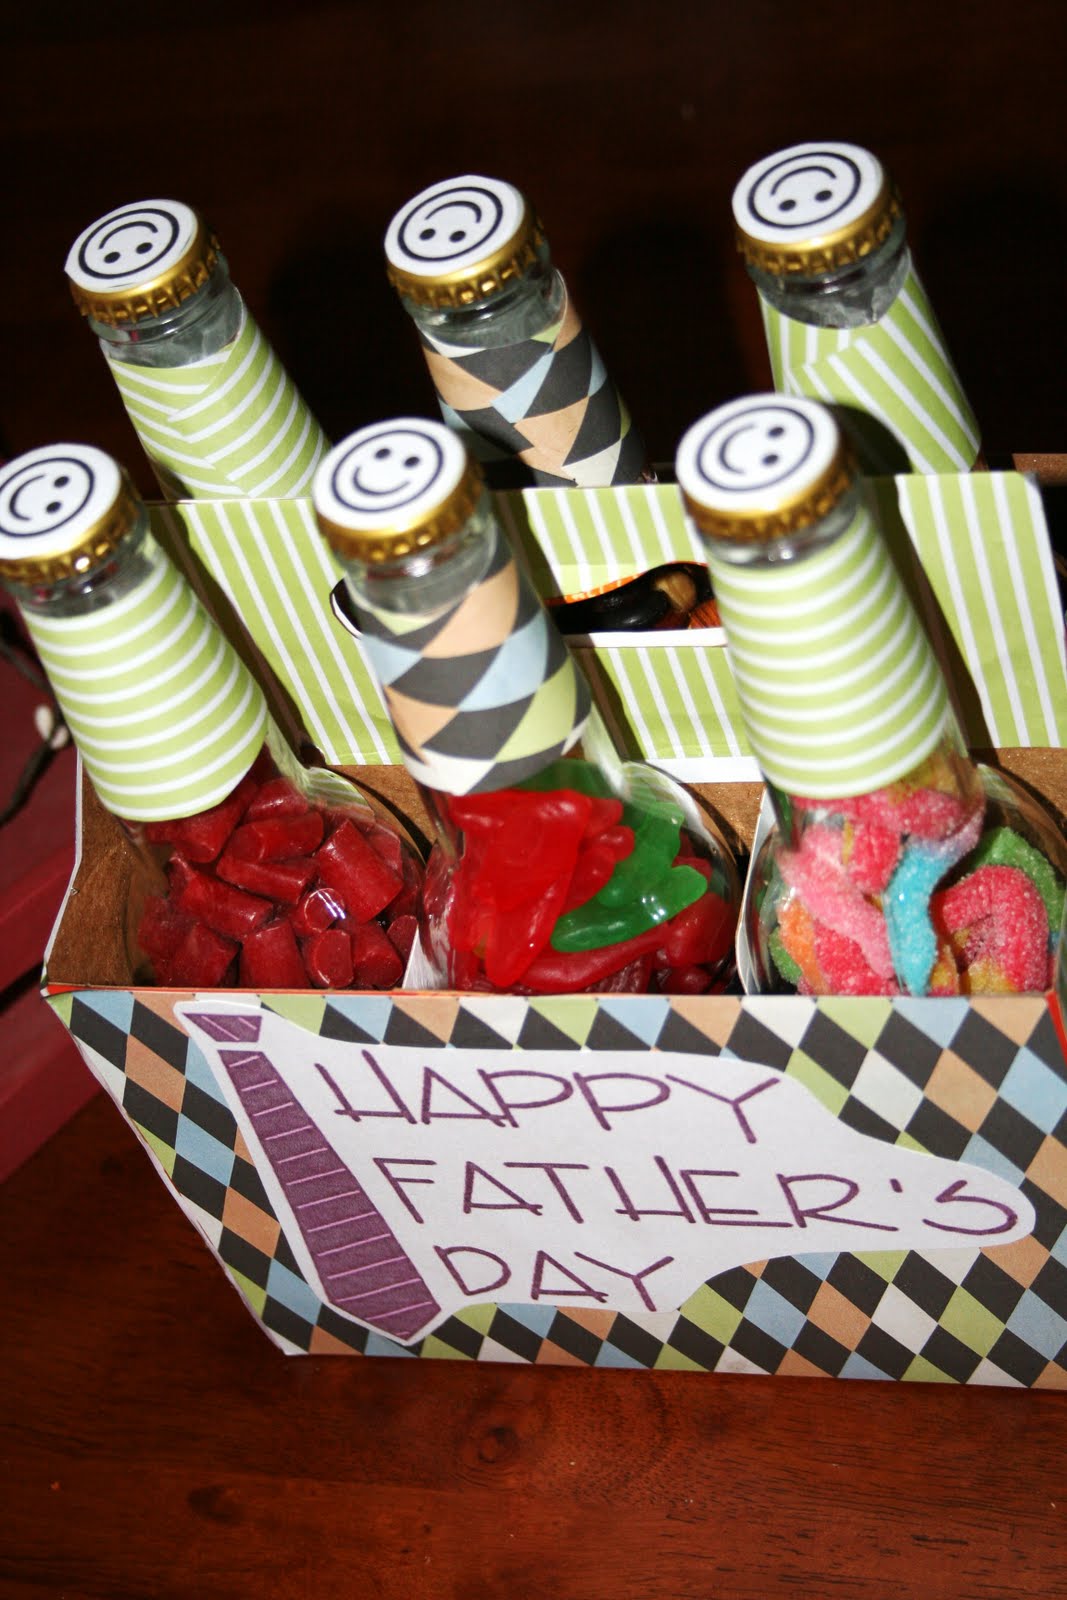
6 Bottles:
Item's Needed:
1- 6pkg of IBC cream soda, or Orange Cream Henry Weinharts
3-4- sheets of scrapbooking paper that coordinate
Glue
Scissors
6- printed off smiley faces/6 little says ex. "I love you" "your the best" 1- Happy Father's
Day! (All done on Microsoft and printed on cardstock)
6- different kinds of candy or snacks (preferrably small to fit in and out of the bottle)
*I used Cherry Nibs, Trail mix, Sour patch kids, Gummy worms, Boston Baked Beans, & Swedish Fish
Step 1: Drink the soda out of the bottles I recruited my hubby to do this for me!! :) Or you can pour them out whatever you chose to do!! Then wash out all 6 really well, peel off the stickers and make sure they dry completely!
 Step 2: Take your 3 coordinating scrapbook papers...and also your scissors
 Step 3: Cover all 6 bottles around the middle where the wrapper originally was
 Cover the box also...
 and the tops of the bottles like so!!
 Step 4: Fill all 6 bottles with a different candy or snack
 Step 5: make sure it all fits well into your box! :)
 Step 7: Take your 6 printed sayings and glue them on to the scrapbook paper in the middle of the bottle.
 Step 8: Also glue on the "Happy Father's Day!" & the 6 smiley faces like so:

Step 9: Make a little card to go with it and there you have it!! :)

Another Quick Father's Day Idea:
COUPONS FOR DADDY!
Items Needed:
Items Needed:
Assortment of made up coupons (I made all of them on Microsoft)
ex. Help mow the lawn, dishes, wash the car...
Hole Punch
Scissors
Coloring Crayons
Your kiddos
1- ring to connect them all
Step 1: Start by cutting out all of the coupons making them all about the same size

 Step 2: Have your kiddos color the pictures on them!!
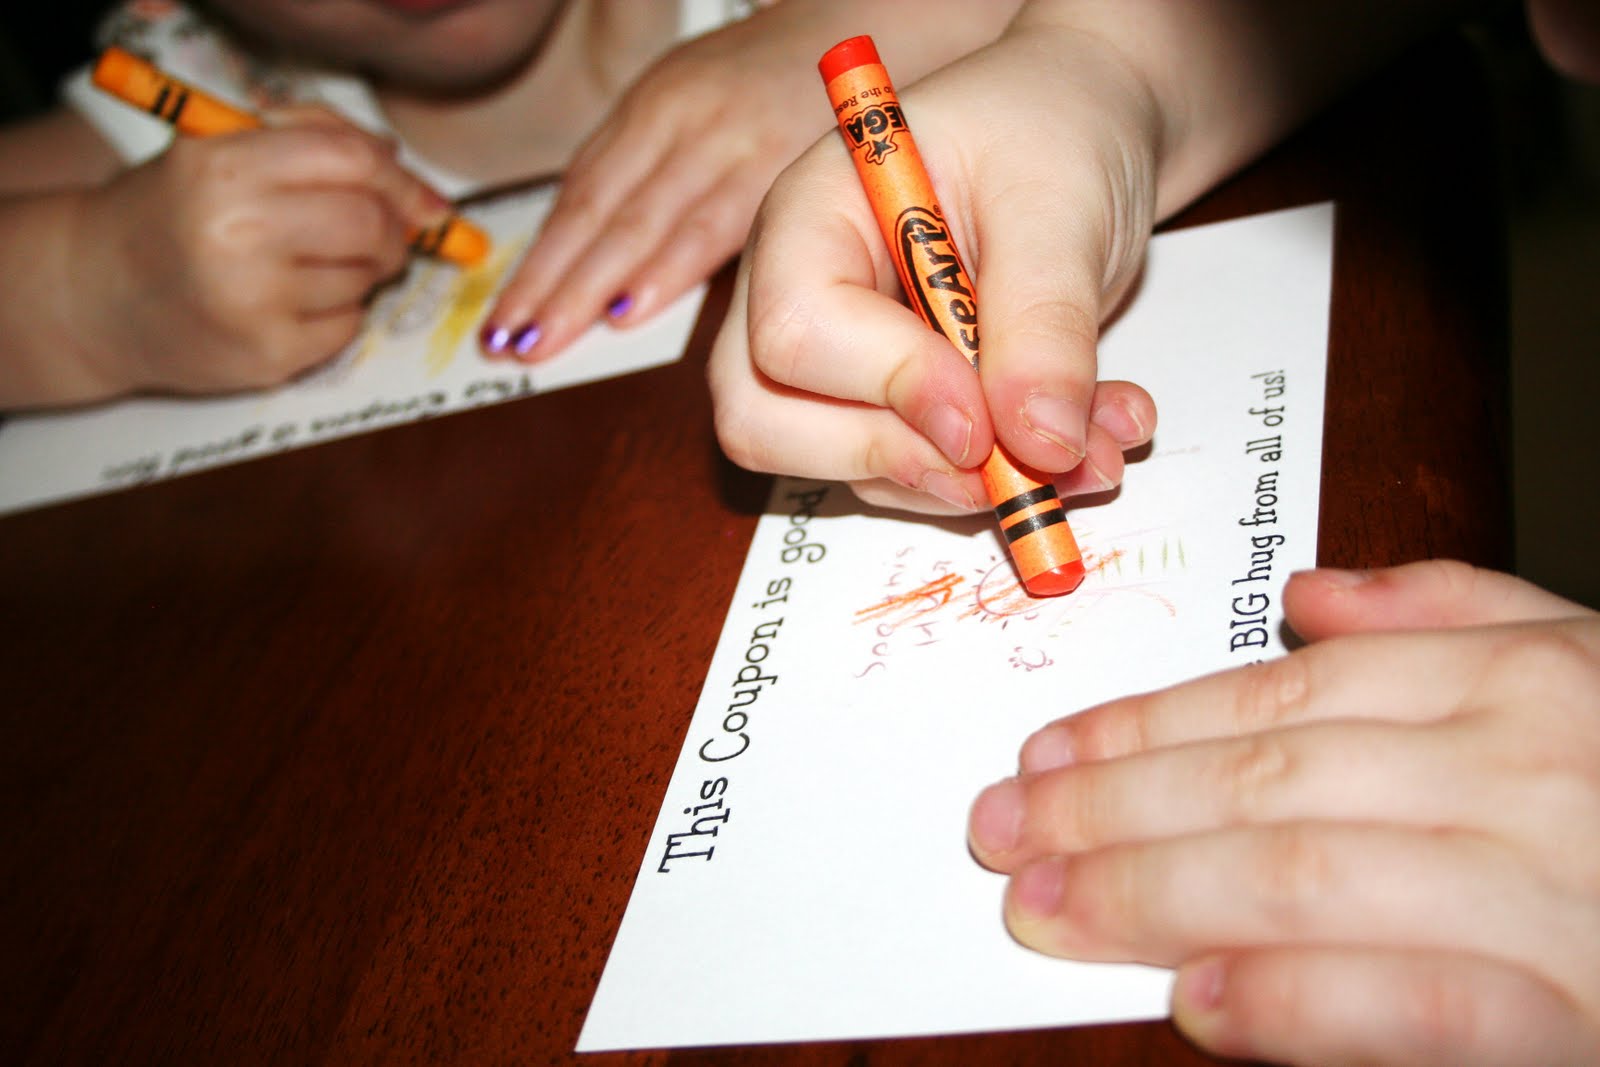 Step 3: Punch holes in the top left corner of the coupon
 Step 4: Connect them with the ring.
 Your all done!! Super cute! :)
 {daddy's day}


